As a web developer your terminal is a core part of you toolkit. I recently had to reformat my Mac and that meant I had to setup my terminal again from scratch. I could have pieced it together from a back up but I thought it would be a good opportunity to start over and see what's changed in the years since I last did this.
This is what I got to, looks pretty nice right?

Let's look at that line, it tells me:
- All-The-Code-Website is the current working directory
- on main tells me I'm on the main git branch
- [$!+] tells me some git statuses, I have
$stashed changes (that's never good!),!unstaged changes and+uncommitted changes - on version 0.1.0 of the site
- running node version 16.15.0
Handy right? Let's look at how I made this and at some key terms along the way.
Terminal App
I use two terminal apps:
- iTerm2 - one of the most powerful and extendible terminal apps for the Mac
- The one built into VSCode
A terminal is the name given to an application that runs a shell - we will cover the shell next. There is one that comes with MacOS but it's not great
So, go download iTerm2.
This is a fairly Mac specific post however it looks like a similar set up is possible on Windows if you use WSL and a terminal app like Hyper or Tabby.
Command Shell: ZSH
The default command shell on MacOS is now ZSH. It used to be Bash but this changed with the release of MacOS Catalina. Both are different types of the same thing, a shell.
A shell is the interface you are using to interact with you computer within your terminal app. You type commands into the terminal and the shell executes the commands and displays the results to your terminal app.
Oh My Zsh
Oh My ZSH is a great tool that makes your ZSH shell much, much more powerful 🚀 and who wouldn't want that? There are hundreds of plugins available for Oh My Zsh that make you a better developer.
Let's get Oh My Zsh installed, open up iTerm2 and enter the following:
sh -c "$(curl -fsSL https://raw.githubusercontent.com/ohmyzsh/ohmyzsh/master/tools/install.sh)"
After a few seconds it will be installed ... welcome to having more power!
.zshrc
You should now have a new file in your home directory .zshrc. Find out by typing this in to your terminal:
cd ~
ls -a
Line 1 takes you to your home directory, line 2 lists (ls) the contents of that directory and the -a flag makes sure you see all files, even hidden ones (which is what the . at the start of .zshrc does)
If you don't see a .zshrc file then create it with touch .zshrc and then open it with your favorite code editor (if you have VScode installed you can do code .zshrc). I can't imagine this happening though as it should get created with the installation.
If you quit and restart your terminal app you should notice things look a littler different already.
Plugins
Let's add some plugins to Oh My Zsh to step things up.
Find this line in your .zshrc:
plugins=(git)
and change it to this:
plugins=(git copypath dirhistory macos sudo common-aliases gitignore history)
As follows:
- git: handy git details right in your command prompt
- copypath: simply type
copypathand the current working directory is not in your clipboard - dirhistory: use
alt + upandalt + downto navigate your directory structure - macos: handy Mac specific utilities
- sudo: run a command that needs
sudoat the start and you didn't add it, hit esc twice and now you do, along with the command you tried to run - common-alias: does what it says on the tin
- gitignore: no more searching online for
.gitignoretemplates, typegi listto see all that are available - history: type
hto see your command history
Go check out the docs on all these. You can find them in the Oh My Zsh plugins wiki.
You need to tell ZSH to reread the .zshrc file, to do that type this into your terminal:
source ~/.zshrc
Themes
The standard Oh My Zsh theme is ok but my favorite is one we need to install separately - SpaceShip 🚀 check out the SpaceShip theme GitHub repo and then come back and we'll install it!
We need to install PowerLine fonts first. Enter the following in to your terminal:
git clone https://github.com/powerline/fonts.git --depth=1
cd fonts
./install.sh
cd ..
rm -rf fonts
Great, now we can install SpaceShip! Enter the following into your terminal to clone the repo and save it to the ZSH themes directory in one go:
git clone https://github.com/spaceship-prompt/spaceship-prompt.git "$ZSH_CUSTOM/themes/spaceship-prompt" --depth=1
Then symlink it to your Oh My Zsh themes directory with this command:
ln -s "$ZSH_CUSTOM/themes/spaceship-prompt/spaceship.zsh-theme" "$ZSH_CUSTOM/themes/spaceship.zsh-theme"
Now set the theme in your .zshrc file ZSH_THEME="spaceship"
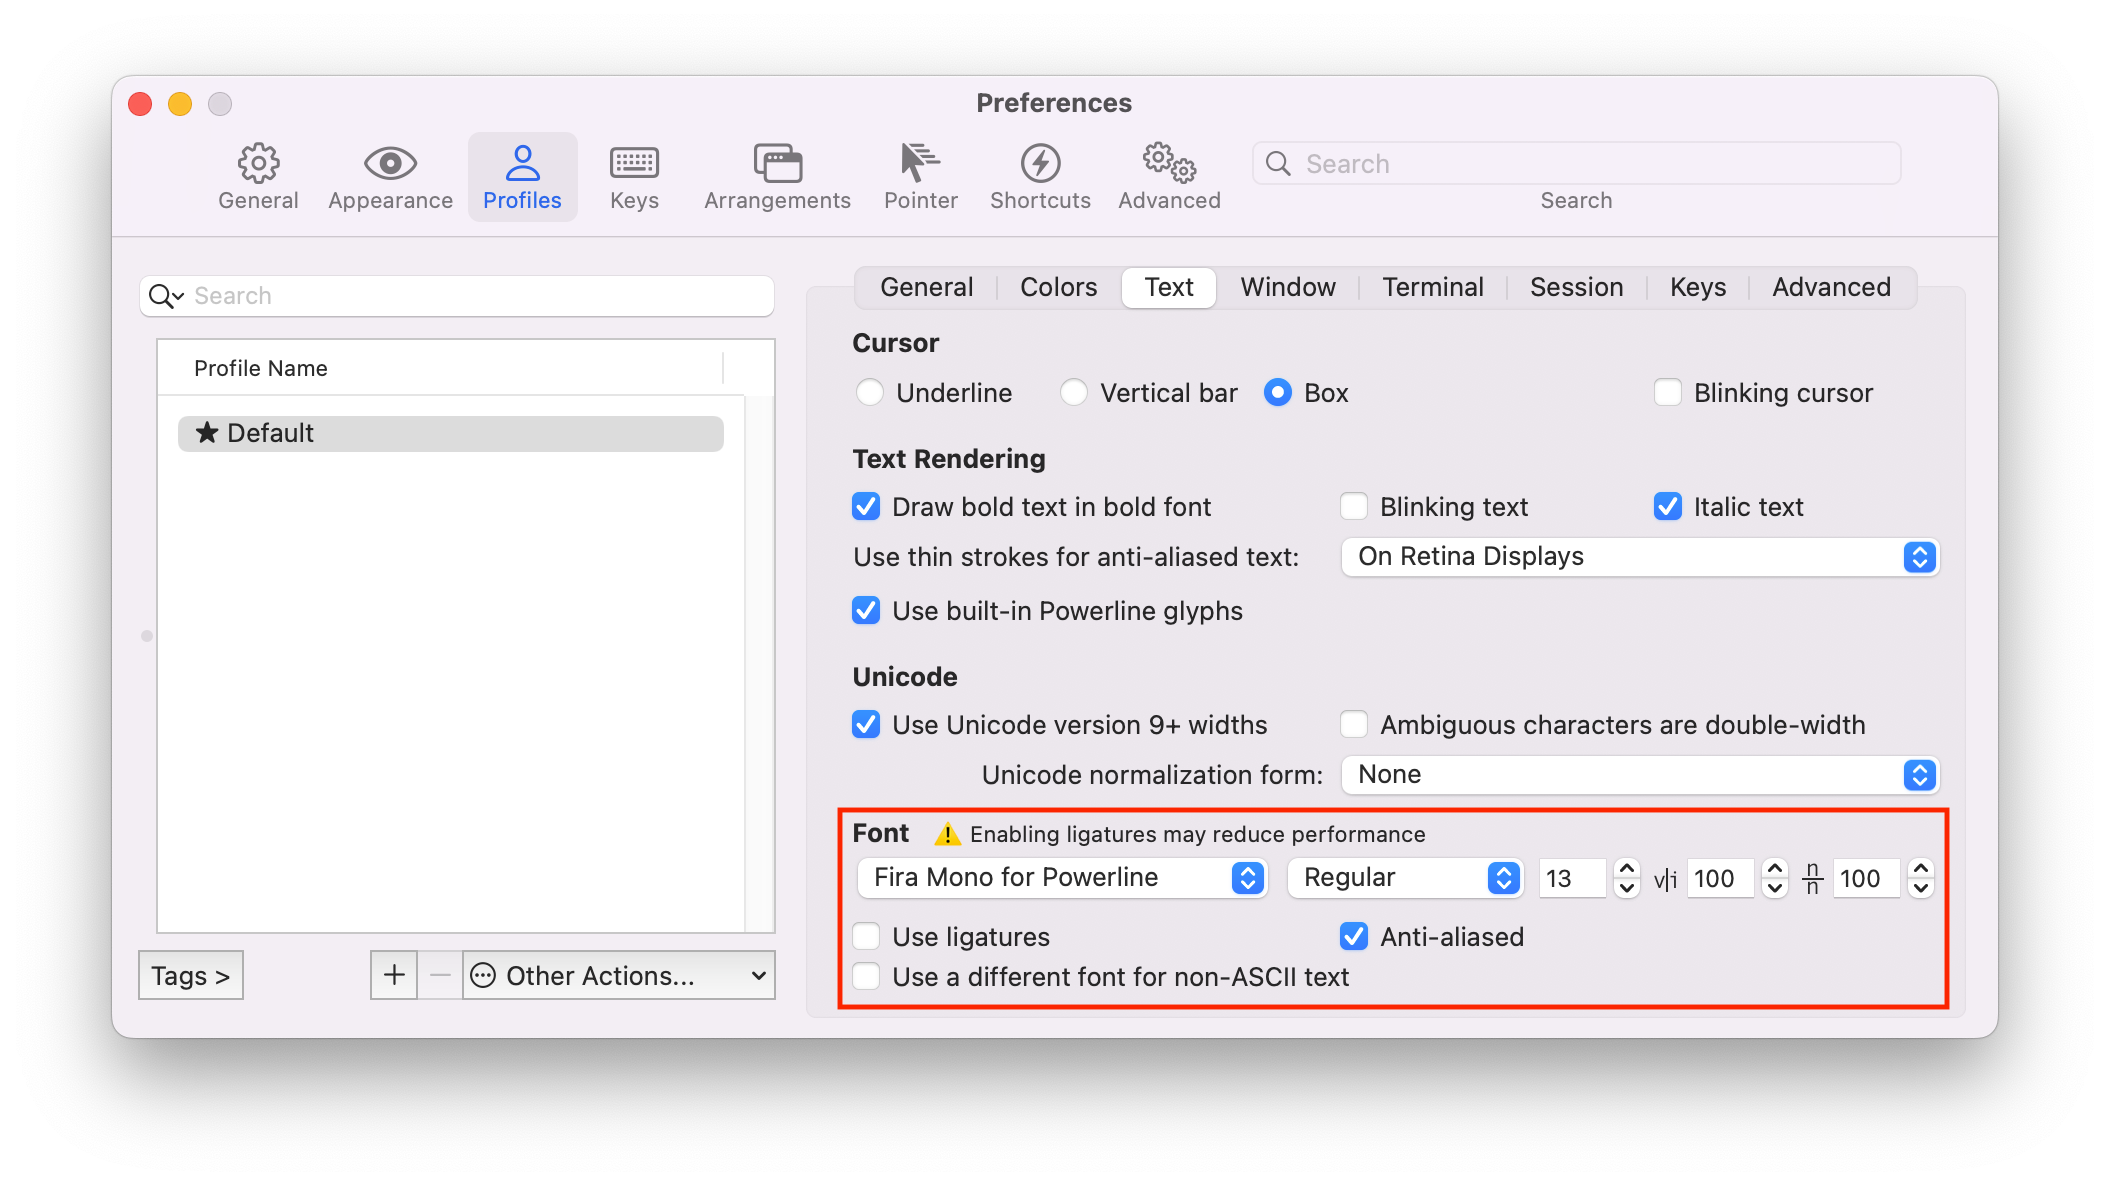
Finally to get the font set up correctly jump back to iTerm2, open preferences go to Profiles and then Text and choose the font you want. It needs to be one of the Powerline fonts for everything to look right.
VSCode
To get fonts working in VSCode you will need to open up the settings file in JSON mode: CMD + Shift + P and select the JSON settings options. Then add these lines to the end of the settings file before the closing }.
"terminal.integrated.defaultProfile.osx": "zsh",
"terminal.external.osxExec": "iTerm2.app",
"terminal.integrated.fontFamily": "Fira Mono for Powerline",
"terminal.integrated.fontSize": 12,
"terminal.integrated.env.osx": {
    "LC_ALL": "C.UTF-8"
}
That last list is to make sure emoji render properly in VSCode, it's still hit and miss but it helps.
Again run source ~/.zshrc and checkout your beautiful new terminal 🚀🥳
Wrap up
So there you go, you've gone from a boring looking terminal to a modern, colorful one and learned some Linux commands along the way! This obviously isn't the most important thing in the world, however your terminal is a key tool in your developer toolbox and having it as good as possible is nice.